| CRT |
IPS/LED/TN |
OLED |
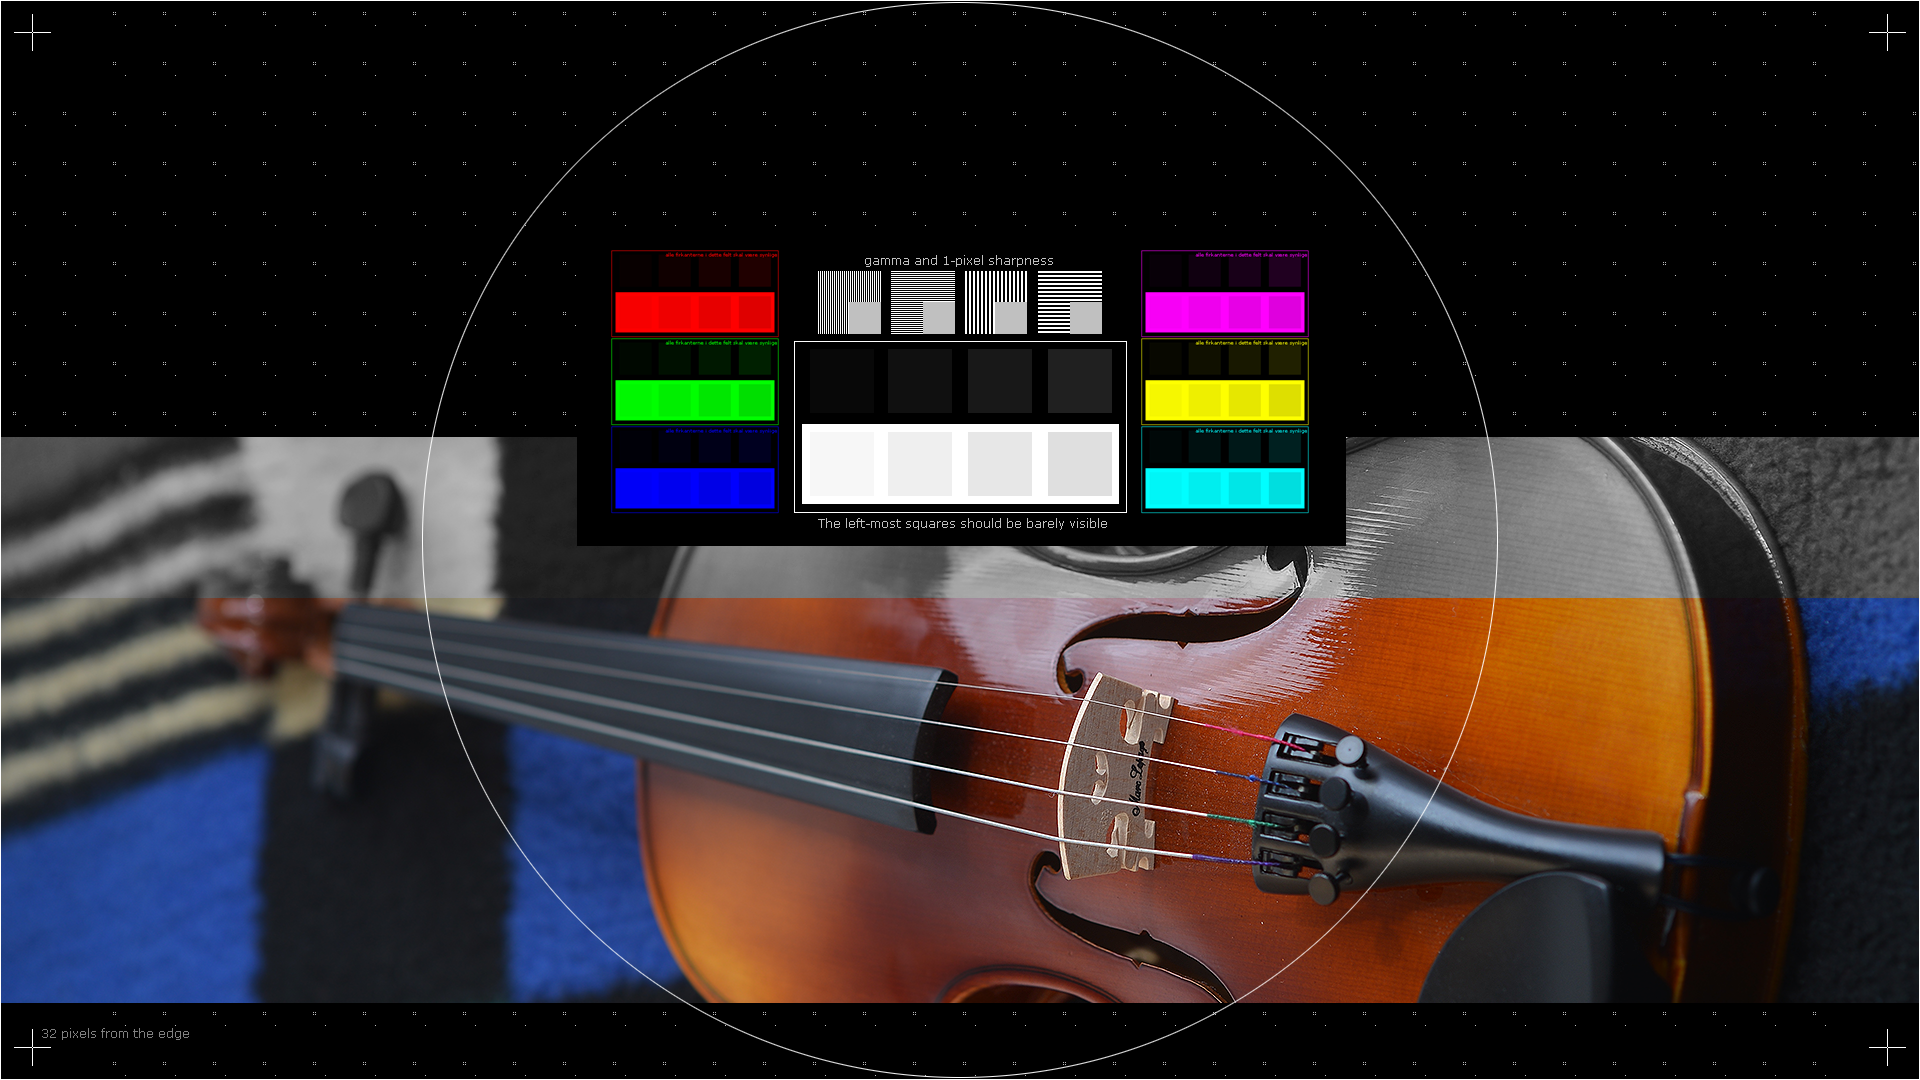
Overexposed
Notice how the faint squares inside the bright square in the middle are all gone.
|
| Should not be possible. Check your signal source output level or settings. |
Reduce either "contrast" or "brightness" or the red/green/blue gain level in the menu of your monitor or graphics card settings. |
Awaiting more info on OLED screens. |
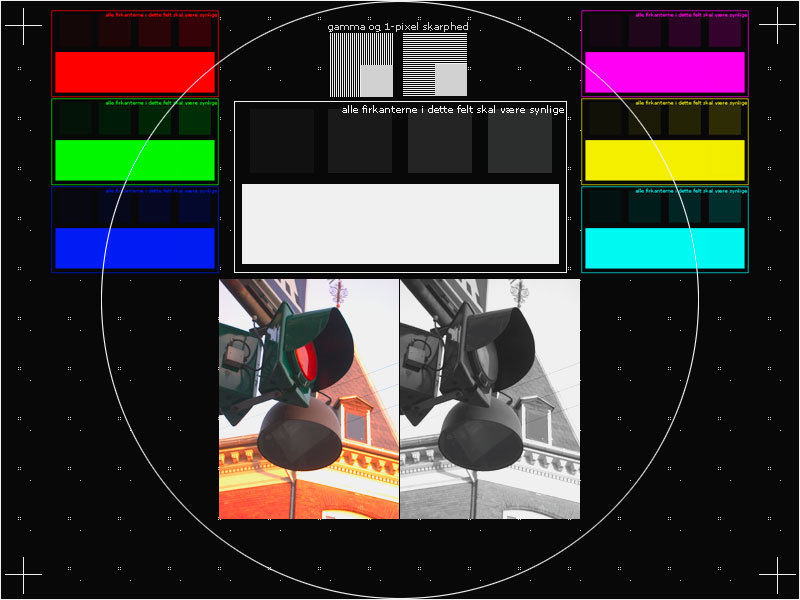
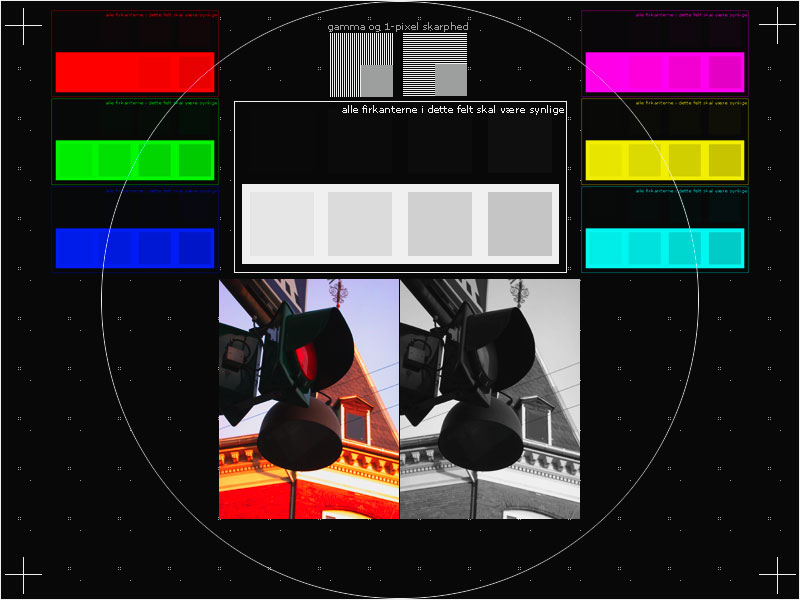
Crushed blacks
All the really dark squares are entirely gone, and the colors appear a bit exaggerated.
|
| Increase "brightness" (sun icon) until the dark squares are barely visible, still leaving the black areas entirely black. |
? |
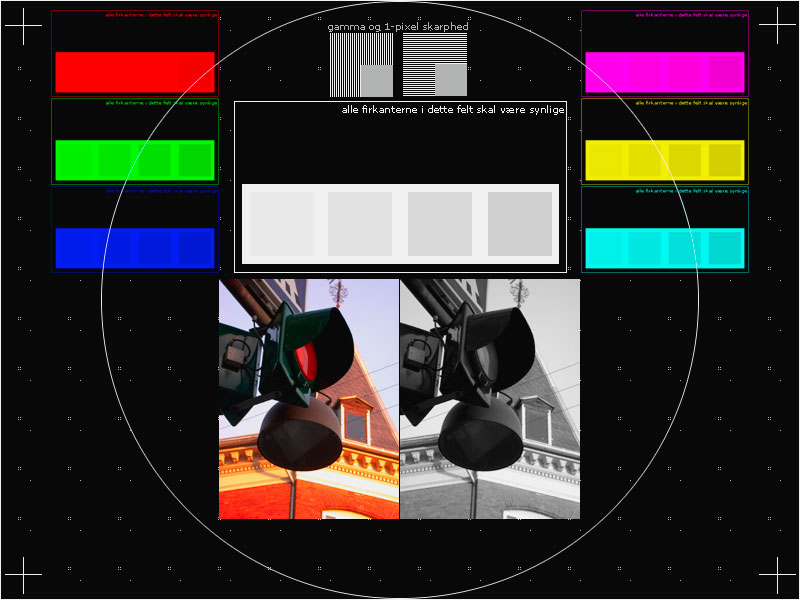
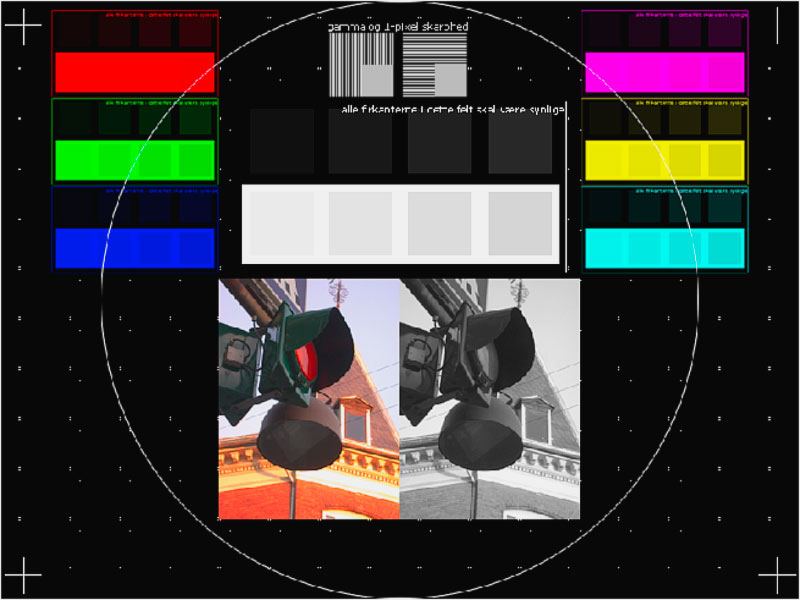
Hazy blacks
The black background is not deep black but rather hazy and gray looking.
|
| Decrease "brightness" (sun icon) until the black areas become as black as they can, and at least three of the four the dark squares are still visible. |
? |
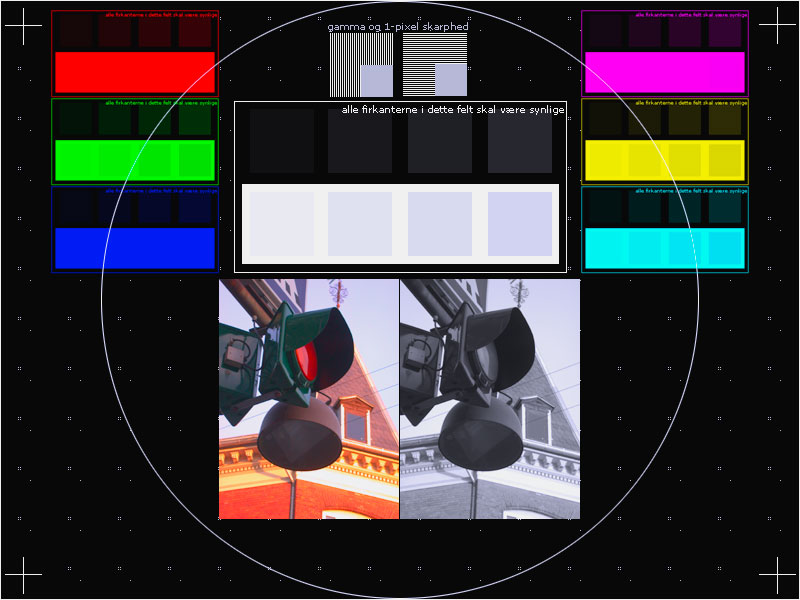
Oversaturated
Notice how the faint squares inside the bright part of the colored squares are all gone, whereas the similar ones in the white area in the middle are still visible.
|
| Should not be possible. Check your signal source output saturation setting. |
Reduce "saturation" in the menu of your monitor or graphics card settings. |
? |
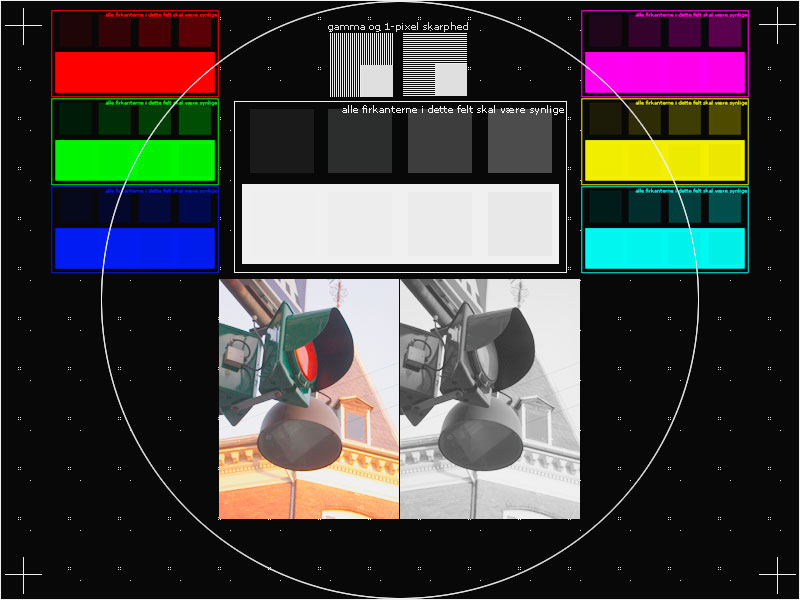
Undersaturated
Colors look pale and washed out. Orange colors appear brown.
|
| Reset the value for "color saturation" on signal source and increase "color" on the display until the red, green and blue color patches appear as vivid and bright as the white one in the middle. |
Increase color saturation on either your signal source or on the display until the red, green and blue color patches appear as vivid and bright as the white one in the middle. |
? |
Some color channels overexposed
The fade from white to pale bright gray appears to have a distinct color instead of being neutral gray.
|
| Cannot happen with a CRT screen. Check your signal source. |
Adjust the "color temperature" of the display, or lower the separate red/green/blue levels until the white and bright gray fade all have the same color. |
? |
Gamma too high
The fade from black to dark gray is very visible but the fade from bright gray to white is hardly visible.
|
| Cannot be adjusted on a CRT display. Check the settings of your signal source. |
Check the gamma settings of your display. If this is not enough, check the gamma of your signal source. |
? |
Gamma too low
The fade from black to dark gray is hardly visible but the fade from bright gray to white is very visible.
|
| Cannot be adjusted on a CRT display. Check the settings of your signal source. |
Check the gamma settings of your display. If this is not enough, check the gamma of your signal source. |
? |
Scaling artifacts
Image detail is lost or appears jaggy.
|
| This cannot be caused by a CRT display itself. Check the scaling settings of your signal source. |
Check the scaling settings of your signal source and make sure it matches the native resolution of your display device. |
